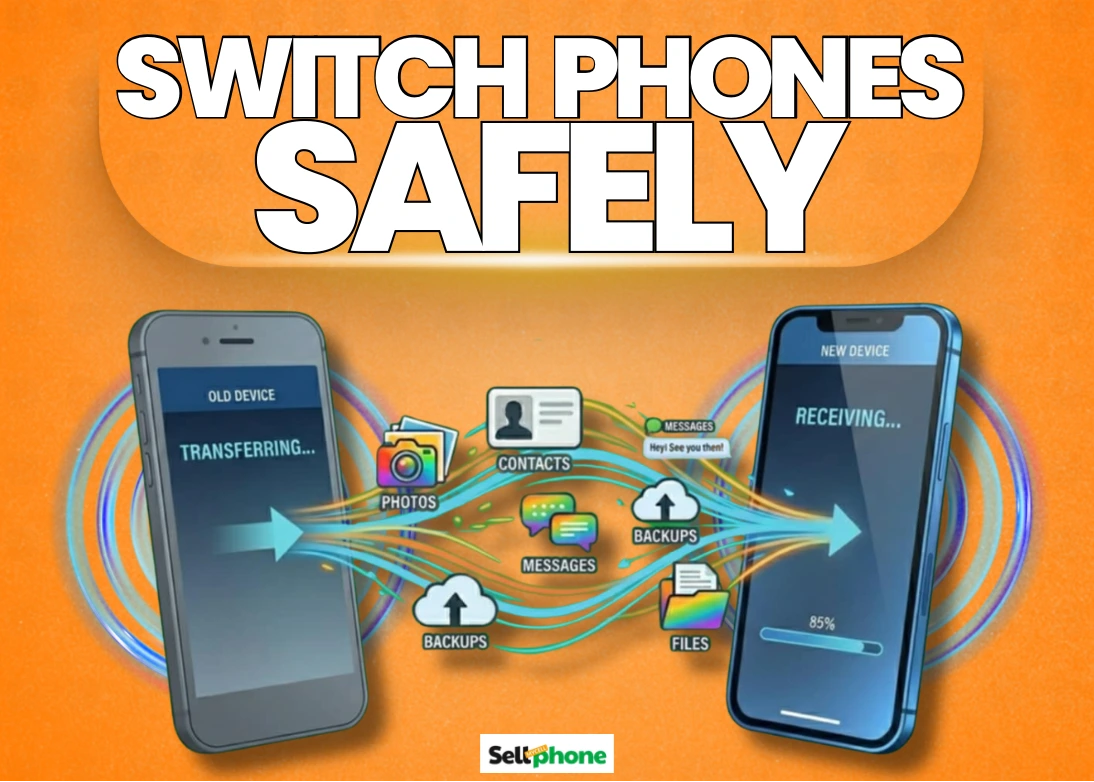
Upgrading your phone is exciting, but don’t let that excitement distract you from protecting what matters most your data. Photos, contacts, and messages don’t always transfer automatically, and one missed step can lead to permanent loss.
Before you make the switch, it’s essential to follow the right backup and transfer process. Below is everything you need to ensure a smooth, stress-free upgrade.
Explore This Guide
Everything you need before upgrading your phone organized for speed
Prepare Before Upgrade
Checklist to avoid mistakes
STEP 02Backup Your iPhone
iCloud & local methods
STEP 03Backup Android Data
Cloud + manual backup
IMPORTANTApp Data Backup
WhatsApp, notes & more
STEP 05Transfer Data
Move everything safely
STEP 06Switch Platforms
iPhone ↔ Android guide
STEP 07Verify Data
Check everything after transfer
WARNINGAvoid Data Loss
Common mistakes to skip
BONUSSell Your Old Phone
Get maximum value
STEP 10FAQs
Quick answers
🛠️ Essential Preparation Steps
| Step | What You Need to Do | Why It Matters |
|---|---|---|
| 01 | Ensure both phones are fully charged or plugged in | Prevents interruptions during backup or transfer |
| 02 | Connect to a stable Wi-Fi network | Avoids data corruption or incomplete transfers |
| 03 | Update your current phone to the latest software version | Ensures compatibility with your new device |
| 04 | Gather necessary login credentials like your Apple ID / Google account login credentials | Required to restore backups and access your data |
How To Back Up Your iPhone (Using iCloud)?
⚠️ Important Note
iCloud syncis not equivalent to a true backup.
Sync updates data like photos, contacts, and notes but it does not include:
- App data
- Device settings
- Home screen layout
While sync keeps data like photos, contacts, and notes current, a full backup captures device settings, home screen layout, and app data not covered by syncing, ensuring a complete transfer. A full backup ensures a complete and seamless transfer to your new device.
Using Local Backup: Back Up Your iPhone to a Computer:
🍏 Mac Backup (via Finder)
- Ensure macOS Catalina 10.15 or later is installed.
- Connect your iPhone to the Mac using a USB cable.
- Open a Finder window and select your iPhone under Locations.
- If prompted, tap Trust on your iPhone and enter your passcode.
- In the General tab, select Back up all of the data on your iPhone to this Mac.
- Optional: Select Encrypt local backup to secure your data and save passwords.
- Click Back Up Now and wait for the process to finish.
🖥️ Windows Backup (via iTunes)
- If you don't have an Apple laptop, here’s how you can back up to Windows instead.
- Install/Open iTunes. Ensure you have the latest version of iTunes installed (preferably from the Apple website rather than the Microsoft Store for better reliability).
- Connect your iPhone to your PC using a USB cable.
- In the iTunes app, click the iPhone button near the top left.
- If prompted, tap Trust on your iPhone and enter your passcode.
- Click the Summary tab in the left panel.
- Under the "Backups" section, select This Computer and click Back Up Now.
- Select Encrypt local backup and set a password.
☁️ How to Back Up Your Android (Using Cloud)
For Android users, Google Drive is the default cloud backup, but there are other options, though not as integrated as Drive is. So, unless you have a personal reason, Google Drive is the best route. Your backup can be done in different ways.
🟢 Manual Backup via Google One
- Open your device’s Settings.
- Tap Google > All services > Backup.
- Ensure Backup by Google One is turned on.
- Turn on backup for photos, videos, and other device data.
- Tap Back up now to start an immediate manual backup.
🟠 Backup Photos & Videos via Google Photos
- Open the Google Photos app.
- Tap your profile icon > Photos settings > Backup.
- Toggle on Backup to start manual backup (or tap Back up now if already enabled).
🟢 Backup Files via Google Drive
- Open the Google Drive app.
- Tap the + icon > Upload.
- Select the files or folders you want to back up.
- Tap Upload to start the transfer.
Pro Insight: The advantage of this method is that you have immediate access to all your backed-up data the moment you log into your account on the new device. Also, make sure to confirm you have enough cloud storage available before you start the backup.
Local Backup for Android (Windows PC)
| Folder | Contents |
|---|---|
| DCIM/Camera | Photos & Videos |
| Download | PDFs & Files |
| Music/Pictures | Media Libraries |
Local Backup for Android (Mac)
Classic Way
Download Android File Transfer (AFT). It’s a basic, no-frills window that opens when you plug in your phone.
Modern Way (2026 Update)
Since AFT can be buggy on newer macOS versions, many users now prefer MacDroid or OpenMTP. These allow you to mount your phone so it actually looks like a disk drive in Finder, making manual backups much smoother.
Using Samsung Smart Switch
If you own a Galaxy device or are moving to one, Samsung Smart Switch makes the backup and transfer process easier. Here's how to make the most of it:
Key Directories to Focus On
Here are a few pro tips for you as you do your local backup. Instead of backing up the whole phone (which includes a lot of "app junk"), focus on these specific directories:
Internal Storage/DCIM/Camera
Internal Storage/Android/media/com.whatsapp/WhatsApp/media
Internal Storage/Documents
/Internal Storage/Download
App-Specific Backups
You are almost there, just a little more to ensure no data is left behind. Certain apps require a separate backup inside the app itself.
For apps like these, you will need to back them up in the app. Even if you have done the local or cloud backup, these things won't automatically come back when setting up your phone.
Android (Google Drive)
- Open WhatsApp > Tap three dots (Top Right) > Settings.
- Navigate to Chats > Chat backup.
- Tap Google Account to select your email.
- Tap Back Up. Ensure "Include videos" is toggled on if needed.
iPhone (iCloud)
- Go to iPhone Settings > [Your Name] > iCloud > iCloud Drive (Ensure it is On).
- Open WhatsApp > Settings > Chats > Chat Backup.
- Tap Back Up Now.
How to Transfer Data to Your New Phone
Wireless Transfer (Quick Start)
- Enable Bluetooth on your old iPhone and place it next to your new one. Follow the onscreen instructions.
- Connect to Wi-Fi and set up Face ID or Touch ID.
- Choose your transfer method: iCloud download for immediate use, or direct transfer for a complete copy.
- Keep both devices close together and plugged in until the transfer completes.
Wired Transfer:
- iPhone 15 → iPhone 15 (or later): USB-C to USB-C cable
- iPhone 14 → iPhone 15 (or later): USB-C to Lightning cable
- iPhone 14 → iPhone 14 (or earlier): Lightning to USB 3 Camera Adapter + Lightning to USB cable (12W+ power adapter required)
- Once connected, turn on both devices and follow the onscreen instructions. Connect to Wi-Fi, set up Face ID or Touch ID, and wait for the transfer to complete before using either device.
Android → Android:
- Turn on your new Android and tap Start. Connect to Wi-Fi.
- When prompted to "Copy apps & data," tap Next.
- Connect your old Android to the new one via USB-C cable for reliable transfer.
- If you don’t have a cable, tap "No cable?" to use shared Wi-Fi.
- Select what you want to move: Photos, Contacts, Device Settings, SMS.
- If moving to Samsung: use Smart Switch. For Pixel: use Data Restore Tool. Let the transfer run in the background.
If you are moving to a Samsung, open Smart Switch on both devices. If moving to a Pixel, use the built-in Data Restore Tool. Let the process run in the background while you finish setting up your Google Assistant and biometrics.
Cross-Platform Transfer (Switching Brands)
Switching from Android to iPhone
- Install Move to iOS app on your Android.
- Power on your new iPhone and go to Apps & Data → Move Data from Android.
- Enter the 6-digit or 10-digit code shown on iPhone into the Android app.
- Join the temporary private Wi-Fi network created by the iPhone when prompted.
- Select camera roll, contacts, WhatsApp history, and Google Account settings to transfer.
- Wait for the iPhone loading bar to finish, even if the Android says it's done.
Switching from iPhone to Android
- On your iPhone, go to Settings > Messages and toggle iMessage OFF. Go to Settings > FaceTime and toggle FaceTime OFF. This prevents missed texts from other iPhone users.
- On your iPhone, install Google Drive. Go to Menu > Settings > Backup and sync your contacts, calendar, and photos.
- During the Android setup, connect your iPhone to the Android via a USB-C to Lightning (or USB-C to USB-C) cable.
- Tap "Trust" on the iPhone screen when the prompt appears.
- The Android will scan the iPhone. Select the data you want to import (including iMessage threads, which will be converted to standard texts).
- Sign in to your Google Account on Android to pull down the backup you made in Step 2.
After Transfer: Double-Check Everything
Before resetting your old device, make sure the following are all correctly transferred and accessible on your new phone:
-
✔Photos and videos are visible.
-
✔Contacts are synced.
-
✔Messages are restored.
-
✔Important apps are logged in.
-
✔Two-factor authentication codes work.
-
✔WhatsApp chats are accessible.
✅ This helps you to quickly find and retrieve anything that probably didn't transfer initially due to one oversight or the other.
Common Mistakes to Avoid
Watch out for these common mistakes when backing up or transferring your data:
-
⚠Relying only on SIM card contacts
-
⚠Forgetting to back up WhatsApp
-
⚠Skipping 2FA app transfer
-
⚠Starting transfer with a low battery
-
⚠Resetting the old phone too early
⚡ Following these tips will save you from costly mistakes. Always double-check your preparation steps before starting the transfer.
FAQs
=
⏳ Final Thoughts | Protect & Transfer Your Data Before Upgrading
Upgrading your phone is exciting, but losing important data can be costly and stressful. Photos, messages, contacts, and app data are all precious, so back up carefully before making the switch to a new device.
💡 Pro Tip: Make sure to use the right backup method for your device:
- 🍏 Sell Apple iPhone / iPad – iCloud, Finder, or iTunes
- 📱 Sell Samsung Galaxy Phone – Smart Switch, Google Drive, or local backup
- 📲 Other Android Phones – Google Drive & local backups
Using the right method for your device ensures a smooth transfer without losing any important data.
Don’t risk losing precious data or money on your old phone SellMyCellPhone.com guarantees fast quotes, free shipping, and high payouts for all devices.
=